Showing posts with label general contractor. Show all posts

Apr 20, 2016

Rebuilding Enclosed Back Porch to Appear Like an Open Porch in North Church Hill Part 3

This the next part in our series on the enclosed back porch that will have the facade of an open porch.
See the first part (demo to framing) here ;
and the Second part which takes us from framing to to exterior completion and interior drywall

When we last left off, the exterior which has the facade of a full porch using Boral for simulated column, handrails, and trim, and hardiboard cladding was in the process of being installed... here are the complete photos.


With paint! This is infinitely nicer than the previous wonky porch.


And just for perspective, a before photo:

Now we go to framing the inside. 

There are two parts to this: an upstairs bathroom remodel, adding a downstairs bathroom and laundry room to the enclosed porch, and a master suite closet/nook.

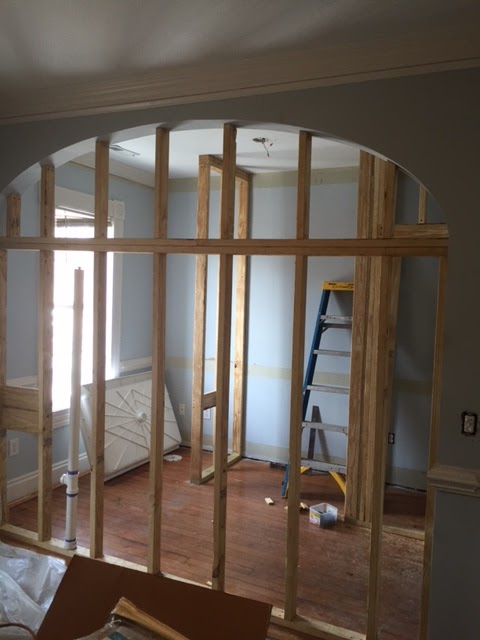
 In the last post, the crew had just begun framing the interior and progress continues. There is Jerrett working on what will the closet in this master suite


Then the electrical rough-in happened


And drywall. We had to cut the drywall around the arched opening. 


Mar 29, 2016

Rebuilding Enclosed Back Porch to Appear Like an Open Porch in North Church Hill Part 2

This the next part in our series on the enclosed back porch that will have the facade of an open porch. See the first part (demo to framing) here

We left off with Chad and Cody installing an LVL on the second floor, and we pick up with second floor framing.

We are also replacing the roof. Here are the 2x8 rafters.


Roof Sheathing, 4x8 plywood panels cut to fit.


All of the sheathing is complete!
 

And wrapped with Tyvek.


Our roofers: Saunders Roofing put the drip edge and TPO roof  down.


Then came the gutters, windows, and a 200 pound door.

Syd, Ryan, and Sean put the hardboard siding on the building that they will then affix the faux columns, railing, and other porch material to.


Speaking of which... these are the Boral column bases that with give the illusion of full columns.


While Syd, Sean, and Ryan worked on the exterior cladding, Cody, Chad, and Jerrett began framing inside.


Mar 23, 2016

Restoring Doors at Tredegar Iron Works

 We recently completed a small job (there are small jobs, but no small clients!) for Tredegar Iron Works repairing two custom doors that had rotted from water that had gather around the bottom during heavy rains. 

The first step was getting the doors off an in the shop. They were heavy! It took 3 to 4 people to move these doors.

First, we performed surgery using a scalpel (never an ax) to remove all of the rotted portions of the doors.


Next, we did dutchman repairs on the door stiles.


then we took tongue and groove boards and cut them to fit inside the large lower panel. The fact that the boards ran diagonally required special attention to make sure that the diagonal cuts lined up with the stiles and rails frame around the panel.

Then, re-installation. Paint will be done by others.


Sean decided to get to know some of the locals.


Feb 9, 2016

Museum District Kitchen and Powder Room Renovation

We recently completed a 3 week long kitchen and half-bath renovation in the Museum district of Richmond. 
The Superintendent for this job was Cody McIntyre and his Carpenter's Helper was Jerrett Clark.

The kitchen and bathroom weren't outright disasters, but the kitchen was a little cramped (as tends to be the case in the Museum district) and had outdated appliances, counters, and cabinets. Our goal was to remodel the kitchen and remodel the powder room while making it a bit smaller.

The first step was, of course, demolition. 


We got rid of that hot water heater in favor of a tankless one that we mounted on the outside of the house.


Once we tore up the vinyl we found some bad floor boards in the kitchen and powder room. Since we had to take the floor up to allow our plumber, Ronnie Gray, to rough-in the bathroom; we replaced the floor boards with some salvaged Tongue & Groove flooring from a house of similar age that was demolished.


We framed in the bathroom and installed a pocket door (to save space). 


Once rough-in of plumbing, HVAC, and Electric were done, we went to work on drywall repairs and hanging dry wall for the powder room.


 The cabinets and counter-tops came form Reico Kitchen and Bath who also did the installation.


Next we put up door trim and baseboards, installed plumbing and electrical fixtures, sanded and polished the floors, and then painted.

The finished product! 


There is no such thing as a small job for RBVA 

Oct 15, 2015

Framing the roof and Master Bedroom for Church Hill Restoration

Work continues on E Grace Street in Church Hill. We have packed and framed the walls, laid down the floor, and are about to begin framing the roof on the back of the house.


Sep 22, 2015

Whole House Restoration 2502 E Grace St.

We've recently taken on a big project in a whole house restoration at 2502 E Grace St. This attached house was built in 1879. It has been severely neglected for the better part of two decades. The group that took this project on is concerned with not only providing clean, modern living space, but preserving as much of the historical character of the building as possible. It is a historic tax credit project, which is something that we specialize in.

After a month of selective demolition, we were finally able to get to work on framing the house. We finish the family room floor and have moved to framing the ceiling of the first floor/floor the second floor.


We're using the original girders that rest in pockets in the brick wall.


The joists were not salvageable, so we have to put new ones in.