Showing posts with label custom millwork. Show all posts

Apr 20, 2016

Rebuilding Enclosed Back Porch to Appear Like an Open Porch in North Church Hill Part 3

This the next part in our series on the enclosed back porch that will have the facade of an open porch.
See the first part (demo to framing) here ;
and the Second part which takes us from framing to to exterior completion and interior drywall

When we last left off, the exterior which has the facade of a full porch using Boral for simulated column, handrails, and trim, and hardiboard cladding was in the process of being installed... here are the complete photos.


With paint! This is infinitely nicer than the previous wonky porch.


And just for perspective, a before photo:

Now we go to framing the inside. 

There are two parts to this: an upstairs bathroom remodel, adding a downstairs bathroom and laundry room to the enclosed porch, and a master suite closet/nook.

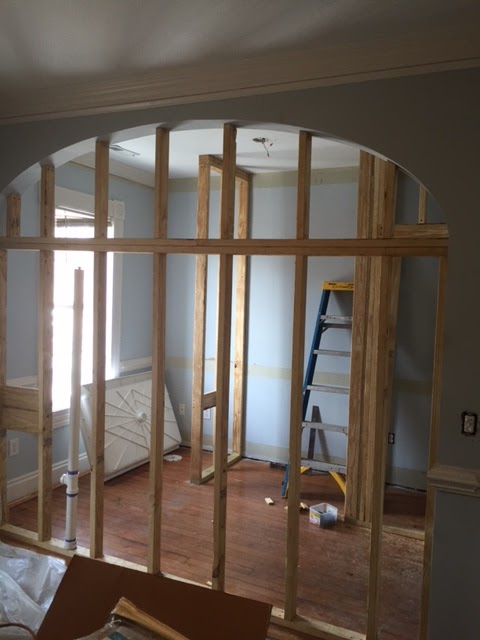
 In the last post, the crew had just begun framing the interior and progress continues. There is Jerrett working on what will the closet in this master suite


Then the electrical rough-in happened


And drywall. We had to cut the drywall around the arched opening. 


Mar 29, 2016

Rebuilding Enclosed Back Porch to Appear Like an Open Porch in North Church Hill Part 2

This the next part in our series on the enclosed back porch that will have the facade of an open porch. See the first part (demo to framing) here

We left off with Chad and Cody installing an LVL on the second floor, and we pick up with second floor framing.

We are also replacing the roof. Here are the 2x8 rafters.


Roof Sheathing, 4x8 plywood panels cut to fit.


All of the sheathing is complete!
 

And wrapped with Tyvek.


Our roofers: Saunders Roofing put the drip edge and TPO roof  down.


Then came the gutters, windows, and a 200 pound door.

Syd, Ryan, and Sean put the hardboard siding on the building that they will then affix the faux columns, railing, and other porch material to.


Speaking of which... these are the Boral column bases that with give the illusion of full columns.


While Syd, Sean, and Ryan worked on the exterior cladding, Cody, Chad, and Jerrett began framing inside.


May 23, 2014

The infamous shed roof at Castlewood is finally up!


Laying out the shed roof framing on the ground to check the dimensions back in March.

 Sometimes hand tools are the best.


She'll get a fancy cooper roof next week.

The turned balusters on this handrail were a very fun project to install. Much thanks to Zach at Van Jester Woodworks for the beautiful millwork. 

Apr 10, 2014

Fancy balusters and handrail.

Building handrails out of antique heart pine means that all my tools dull more quickly, but the end grain is beautiful.
All of these bevels had to be hand cut; this 'V' fits over the bevel of the bottom rail to repel water. These handrails will not be protected by a roof.


All of the balusters, or pickets, are mounted to the bottom rail through the base. We've found that the typical failure of handrails is through the fasteners on the bottom rail. Hiding them is not only aesthetically pleasing, but it eliminates holes in the bottom of the pickets in which water can enter. 

The fasteners are also stainless steel, so in the event water does sneak its way in, the fasteners will hold their ground.

The channel is then filled with a filet, so it appears solid to people that are lying on the ground examining the underside of the bottom rail. 

Finished and installed! Each rail, top and bottom, is mortised into the posts for added rigidity.

We've decided this second story promenade is the perfect place to get married.


Apr 9, 2014

Various in the busy life of Our Beaver

RBVa got a new van!


When the bricks are this wonky, you have to cope the wood to the brick to avoid an extra-large caulk joint to fill the gap between the two elements: wood and brick.  

The bead on this trim was custom milled on site out of clear Western Cedar, using a table saw and a moulding plane found at a flea market.  Then the contours of the brick were traced with a compass and cut out using a jig saw.

Mar 27, 2014

Fun fine carpentry at Castlewood

This will eventually get tongue and groove sheathing, painted baby blue, and protect the entrance to the basement below.


 Cody and Syd got to do some production work! These handrails and pickets are all heart pine.


Mar 10, 2014

Syd's famous mill shop

The past week I've been lucky enough to get to build brackets for a shed roof overhang. It's been a challenging and fun project, and not something I get to do every day. Each element is let into the other, which I accomplished with a combination of power tools and hand tools. The hardest part was getting the angle right, but thanks to the good men over at thisiscarpentry.com, I had a little help with recalling my high school math. 

The inner angle is 39.5 degrees.

This inner angle is 50.5 degrees.

Each bracket will get a chamfer detail before installation. 


 The architect called for net 3" x 5 1/2" clear wester cedar. I purchased rough stock and laminated it to achieve these dimensions. Van Jester Woodwork provided the majority of the material, including the cute scroll detail you can see in the rafter tails below.


 To make the notches for the components of the brackets to lock into each other, I used more than a few fancy toys I have: an electric miter gauge, Japanese-style pull saw and Bosch palm router.


For my final act, she goes together with some inventive use of Titan Straps and regular old bar clamps.